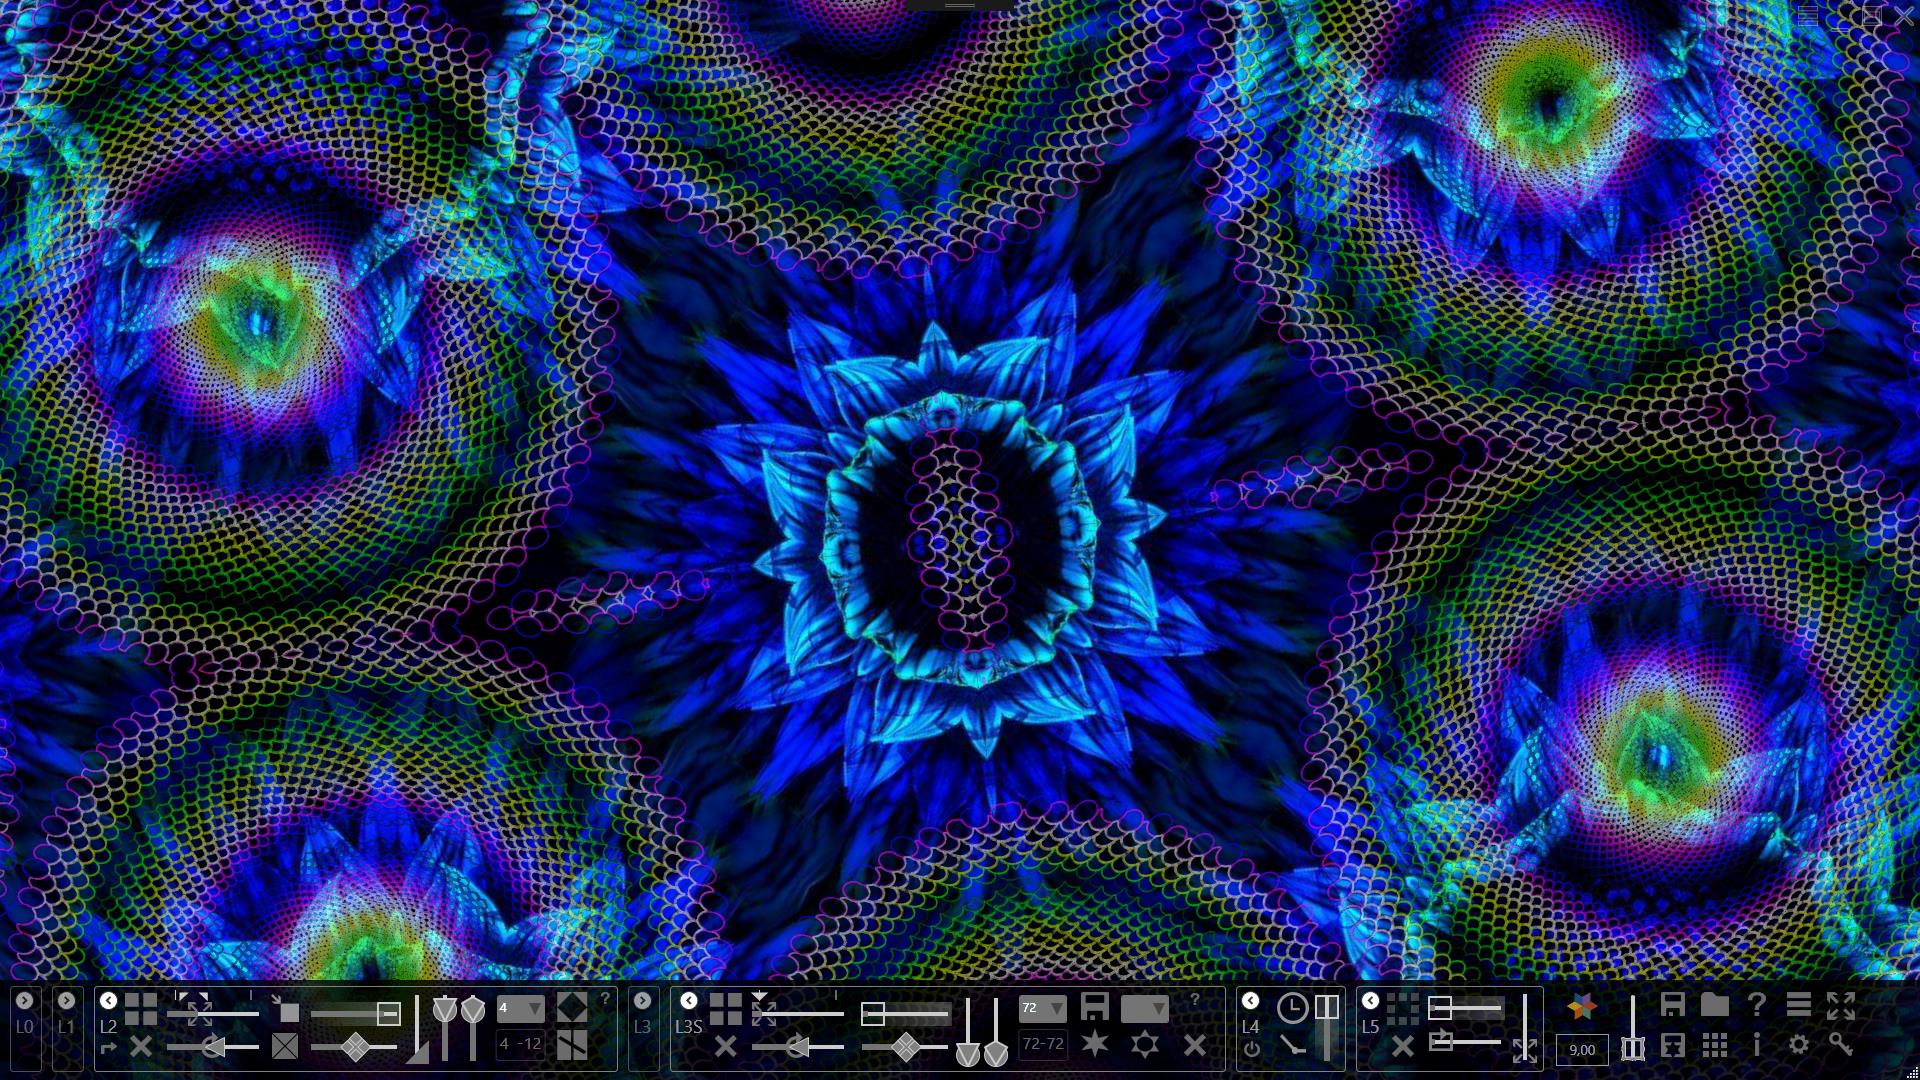
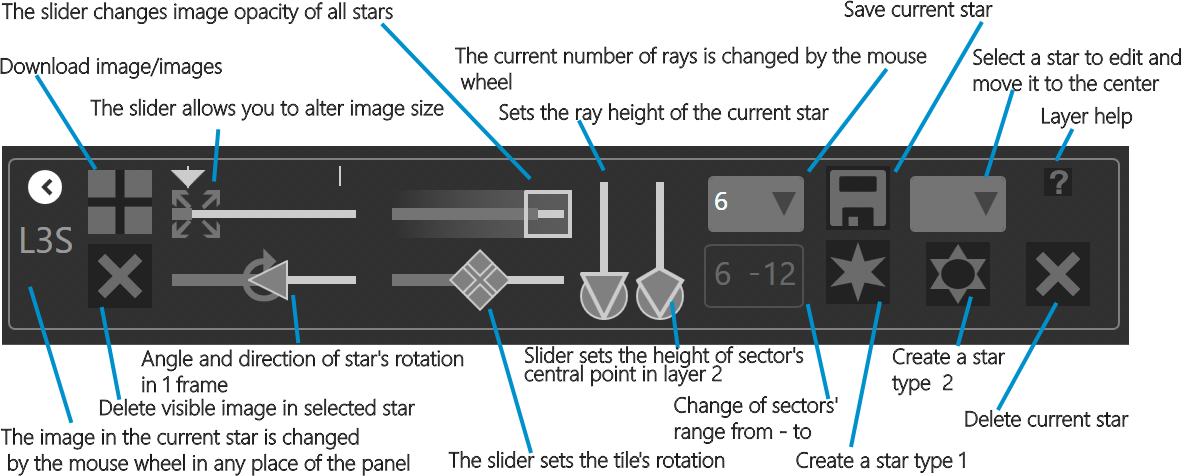
In general, our kaleidoscope can be imagined as a set of 7 glasses (layers) located one above the other, and your images can be placed on each glass in the form of tiles or colors that can rotate, vary their size and etc. When you first start ArtScope, you will see something like this screen. The control panel (the sliding toolbar) is shown at the bottom of the screen,
Icons | Features description | Values |
|
|
|
| Download image/images (picture, photo, and icon) to the appropriate layer. In Windows Explorer, hold Shift/Ctrl and use the mouse pointer to select multiple files. The application supports up to 7 layers. |
|
| Select background color and transparency. For a color in the 0 layer, the color is replaced with a transparent one. Example Sample3.scope |
|
| Delete current (visible) image from the corresponding layer. File is not deleted. |
|
| Option to change the size of an image | 1-5000px |
| Copy settings from L2 to L3/copy settings from L3 to L2 |
|
| The slider allows you to set the tile’s rotation velocity from 15 to +/- 15 degrees for Layer 1. Double click sets value to 0. | -15 - + 15 degree. |
| The slider allows you to alter image size and depending on the size a different number of images can be packed into the sector, (i.e. images are placed like tiles, small size - many tiles, big size – few tiles). In animation process this slider sets size range (from left to right), mouse double-click sets the lower bound (the smallest size), Shift + mouse double click set the upper bound (the largest size). | 1-1000 |
Slider allows you to set the initial direction of tile's size change from small to large and vice versa. In this case, the tile size will increase from small to large.
In this case the tile size is maximum and then will gradually decrease.
|
| |
| Enable/disable the odd sectors. |
|
| The slider changes image/tiles opacity.
| 0-1 |
| During animation, the slider allows you to set the speed of rotation of the sector in degrees per frame. Double click sets the value to 0. | -15 - +15 degree. |
| The slider allows you to set the tile’s rotation velocity from 0.5 to 15 degrees. Double click sets value to 0. | -15 - +15 degree. |
| Vertical slider allows you to set the velocity of tile’s size alteration in layer 2, 3 and 3S (per frame) (lower value – greater smoothness). | 0.1-12 |
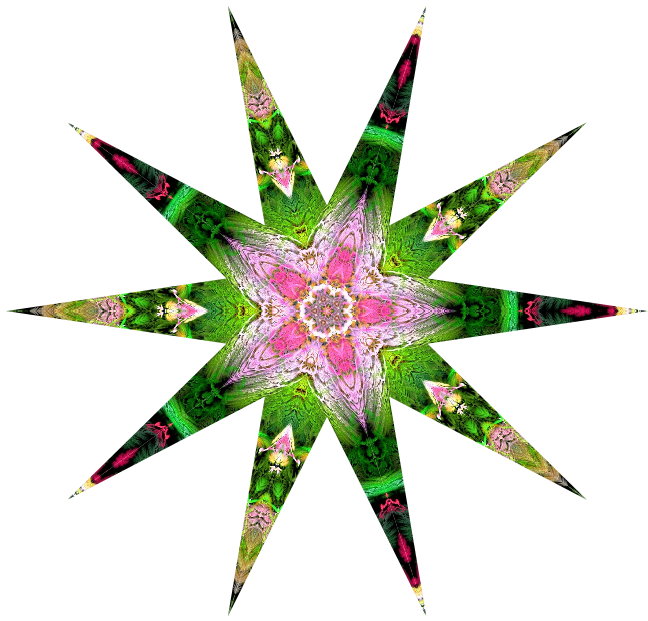
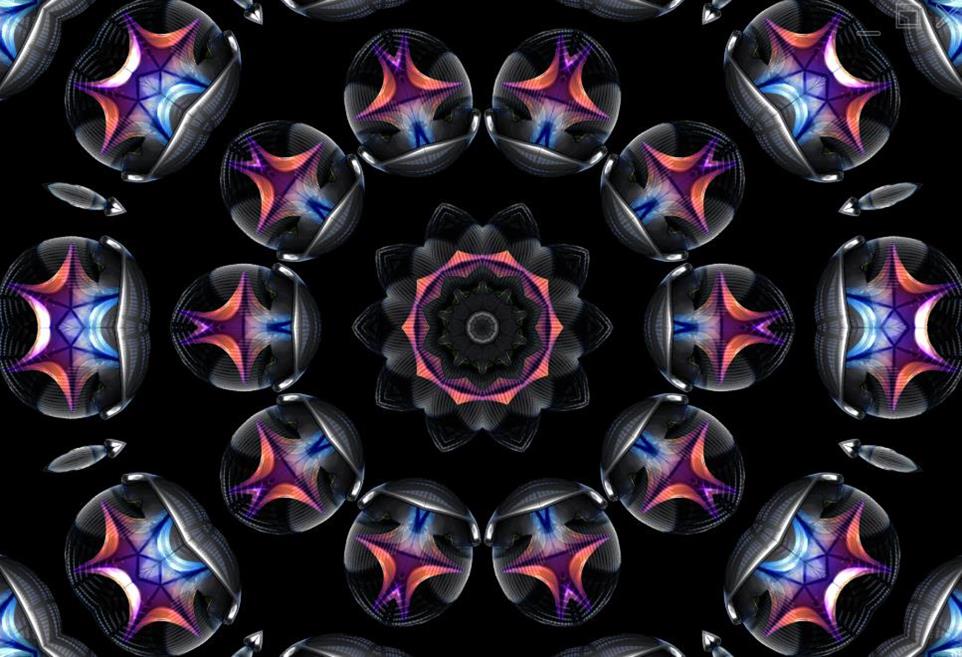
Vertical slider allows you to set the height of a sector in layer 2, 3 and 3S, so you can get a shape of a round Kaleidoscope (i.e. mandala). You can see an example to the right. Double click on the slider just sets the value in½. |
| |
Vertical slider allows you to set the height of the sector’s central point in layer 2, 3 and 3S, so you can get the shape of a Star Kaleidoscope/Mandala. You can see an example to the right. Double click on the slider just sets the value in½. |
| |
|
| |
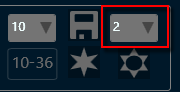
The number of sectors in layer 2, 3 and 3S. To the right you can see an example for 8 sectors’ and 98 sectors’ kaleidoscope. For the dynamic change, please see the next option. |
| |
| Change of sectors' range from - to, during playback of an animation or a video. In this case the number of sectors will vary from 6 to 12 and back, etc. There are two options to change the range: Move the mouse to the left or right digits, when it's illuminated, you can increase or decrease the value by mouse wheel. If there is no wheel you can click on the number in the upper or lower part to increase or decrease the value. Chose the value list in the next field ( |
|
| Tile display mode: Repeat, mirror horizontally, mirrored vertically, mirrored horizontally and vertically |
|
| Select a star to edit and move to the top left corner |
|
| Create a star of the 1st type |
|
| Create a star of the 2nd type |
|
| Switch button. The images in the stars will be loaded sequentially from the images’ list or the same. |
|
| Clock selection button. |
|
| Clock hands selection button. |
|
| Turn hands of clock on / off |
|
| Rotation of layer 5 |
|
| Shows the last selected value of the slider. If you click on a slider, this field will show you its value. After selection of a slider you will be able to change its value not only using mouse, but also from keyboard. Arrow keys and Page Up, Page Down are sometimes more convenient and more accurate. Ctrl + L: switch on/off the display of the values. Click on this field enable/disable display of tags the size of the main form. |
|
| Play/stop animation Kaleidoscope. Ctrl + click this button start Screen Capture (capture of the application window). |
|
Image run time in layer 2 and 3. After this, image will gradually be replaced by new one. Double click sets value to 9 seconds. While creating a video, set this value greater or equal to 4 seconds. | 0.5-120 sec. | |
| Save current view as an image to a file. |
|
| Save project (animation). |
|
| Download project in ArtScope. |
|
| F6 – show layers’ lists of images, see List Of Images. |
|
| Help. |
|
| About ArtScope |
|
| Application settings button - F2 |
|
| The app can run with 4K monitors (3840*2160). If the dimensions of the buttons on a sliding panel you do not comfortable, you can enlarge them using this button (decrease – click button pressed Ctrl key) or by using the +/-keys on the numeric keypad. |
|
| Open Menu-Welcome menu (F12) |
|
| Open input form / unbind license |
|
| Resize window. |
|
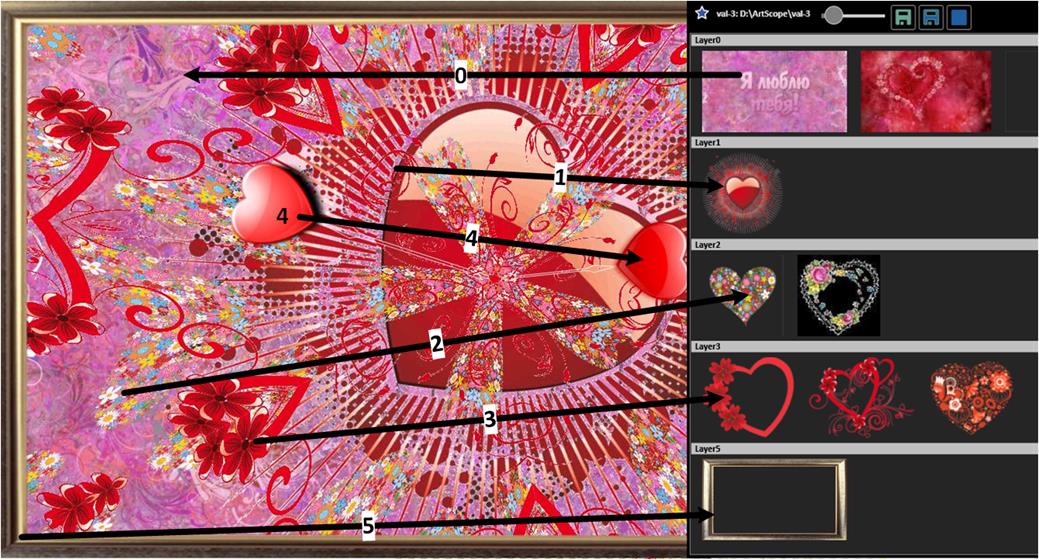
When you create a project, you can include in it up to 7 layers out of which 5 will have animation.
Layer 0 (Background – static layer): any color (![]() ) or set of images, is controlled by button
) or set of images, is controlled by button ![]() . Currently only one image from the list is displayed. The image can be seen through the other layers, if layers 1, 2, 3 and 5 have transparency. The image size can be changed by using the slider
. Currently only one image from the list is displayed. The image can be seen through the other layers, if layers 1, 2, 3 and 5 have transparency. The image size can be changed by using the slider  .
.
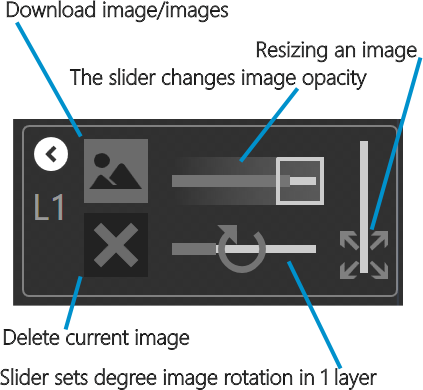
Layer 1 (dynamic layer): On top of the background image, i.e. layer 0. If this image has not gif/png/ico format it will cover Layer 0. Gif/Png/Ico images have transparency and you can see part of the background through them. For transparency, you can also use the transparency slider. To load images, use the button ![]() . One slider – rotation, achieves the animation in this layer.
. One slider – rotation, achieves the animation in this layer.
Layer 2 (dynamic layer): consists of number of sectors (from 4 up to 98) and evenly covers the entire surface from the Center. You can place an image in the sector using button ![]() . When images’ selection dialog box opens, hold down Shift or Ctrl to select an entire group of pictures using left mouse button.
. When images’ selection dialog box opens, hold down Shift or Ctrl to select an entire group of pictures using left mouse button.
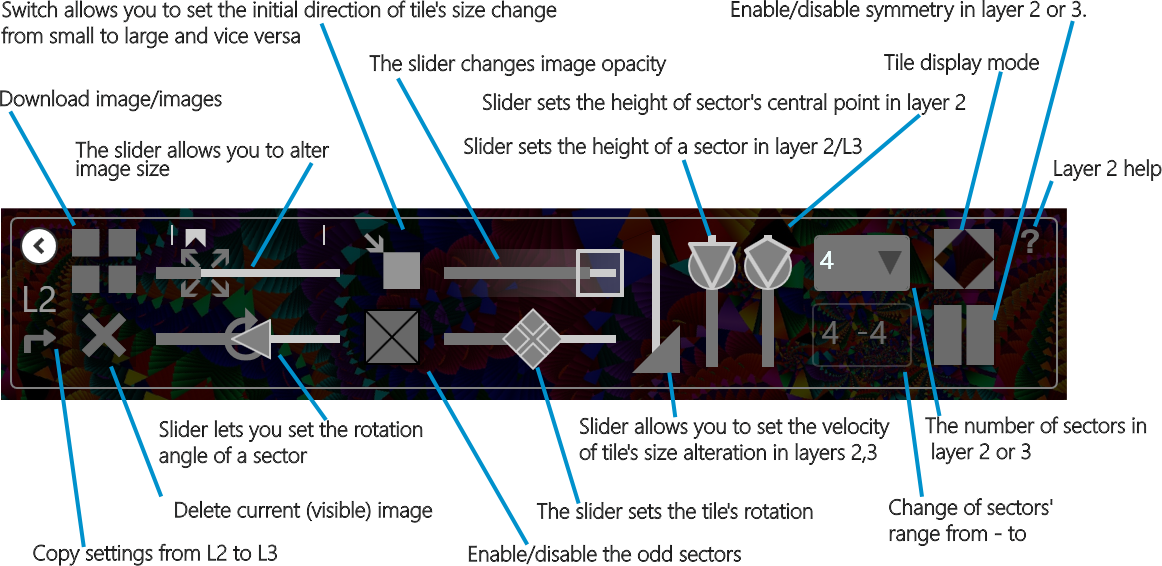

The control panel (the sliding toolbar)
All sliders (when selected with mouse), can be controlled by left and right arrows on the keyboard (smoothly), PageUp, PageDown (rapidly). The animation is achieved in this layer with 4 sliders: ![]() ,
,![]() ,
,![]() ,
, . Form of animation is achieved by sliders
 ![]() ,
,![]() and number of sectors.
and number of sectors.
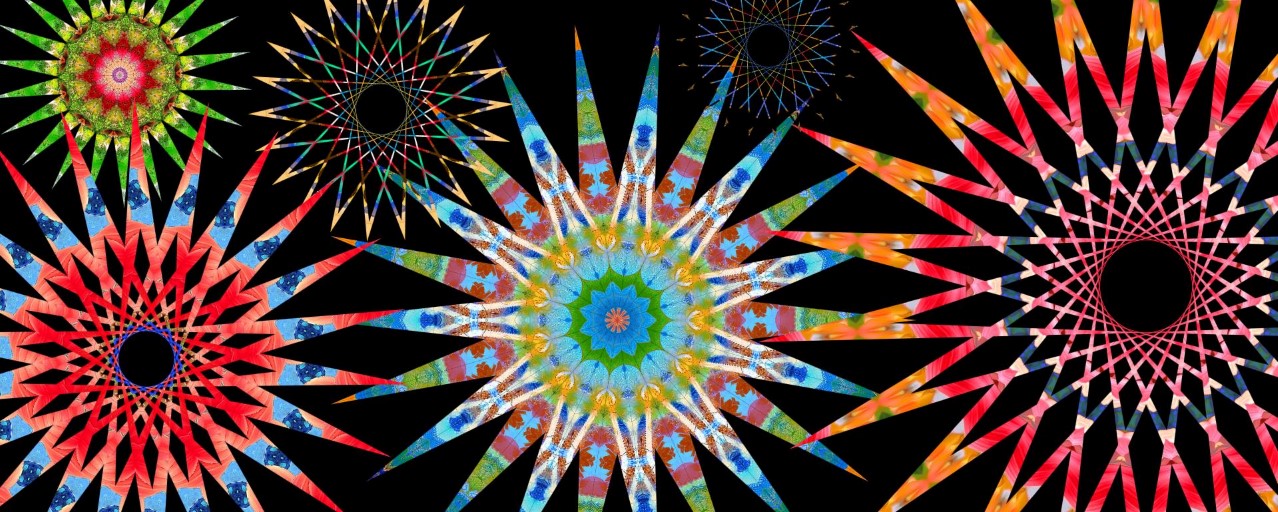
Example.
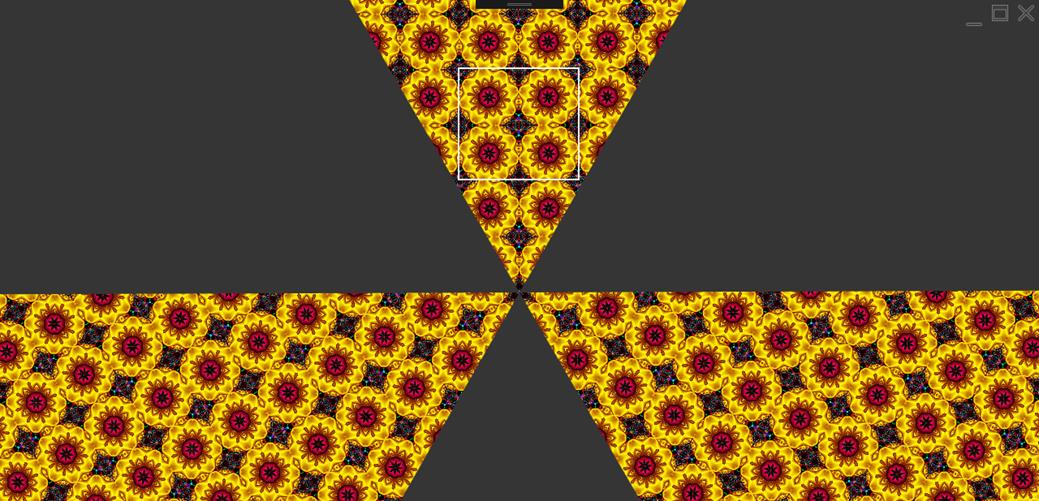
In figure, 6 sectors in the layer are shown in a special way (3 even are off). The layer can rotate in both directions, the angle of rotation is set via the slider sector turning angle. You can change layer’s transparency. The sector is flooded with tiles (one tile is framed with a white border), each tile is just an image from a file. The tiles can be rotated, the angle of rotation is set via the slider - Tile turning angle. The tile size can be changed using the slider Change the size of the tiles, change step is set by the slider – Resize speed tile. The speed of rotation of the layer (all sectors simultaneously), the speed of rotation of the tiles and resize tiles in the layer is determined by the slider the Number of frames per second.
Layer 3 (dynamic layer): is like the layer 2.
Layer 3S (dynamic layer) can consist of 1 to 12 stars, each star consists of sectors or rays (from 4 to 98) and can have any size. It is actually a small kaleidoscope that can be placed in an any place. The star can be of two types - 1 and 2, the 2nd type at certain sizes resembles a snowflake. The first type of star rotates around its center.
The first type of the star
The second type of the star and the center of a black square placed in one of the star's rays.
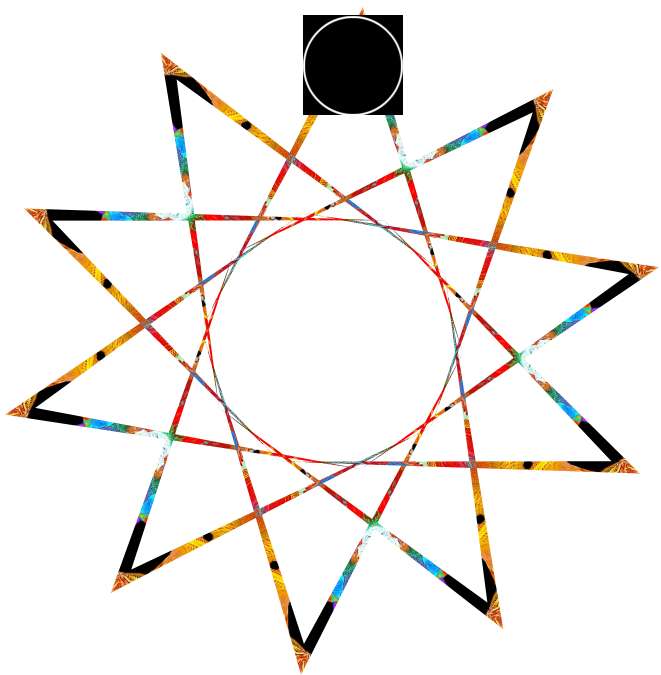
Second type of the star
When you create a star or select it from the list this black square appears. It disappears when you save the star image.
If the center of rotation of the star is positioned outside the application form, the failure stars are possible when creating the video.
The stars it is better to move by this square using the mouse or by pressing Ctrl + (right arrow, left arrow, up arrow, down arrow). You can choose a star in two ways:
Click with a mouse on the star - a black square appears on it.
By selecting from a list
 ,
,
the 1st type star and 2nd moves to the center.
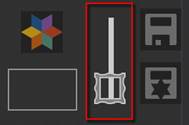
After the star is selected and edited, it must be saved. This is an example of a static image:
The panel for working with stars with a description is presented below.
All created stars can vary in their size, rotation speed, rotation speed of the image inside the star, rotation directions. All stars have same transparency and number of rays. During animation or video creation, images are selected randomly from the list of downloaded images (you can see them: F6 layer’s name L3S). An example of a video of kaleidoscope with stars can be viewed here Space 2017/1 and here 4 stars from 98 rays of rotating in the opposite directions.
With a large number of stars, the animation may look smeared and the movements will not be smooth (a very powerful PC is required).
Layer 4 (dynamic layer): is designed to display animated clock. For clock selection use the button ![]() . For hands of clock selection use the button
. For hands of clock selection use the button ![]() . Below are some of the topics hours.
. Below are some of the topics hours.
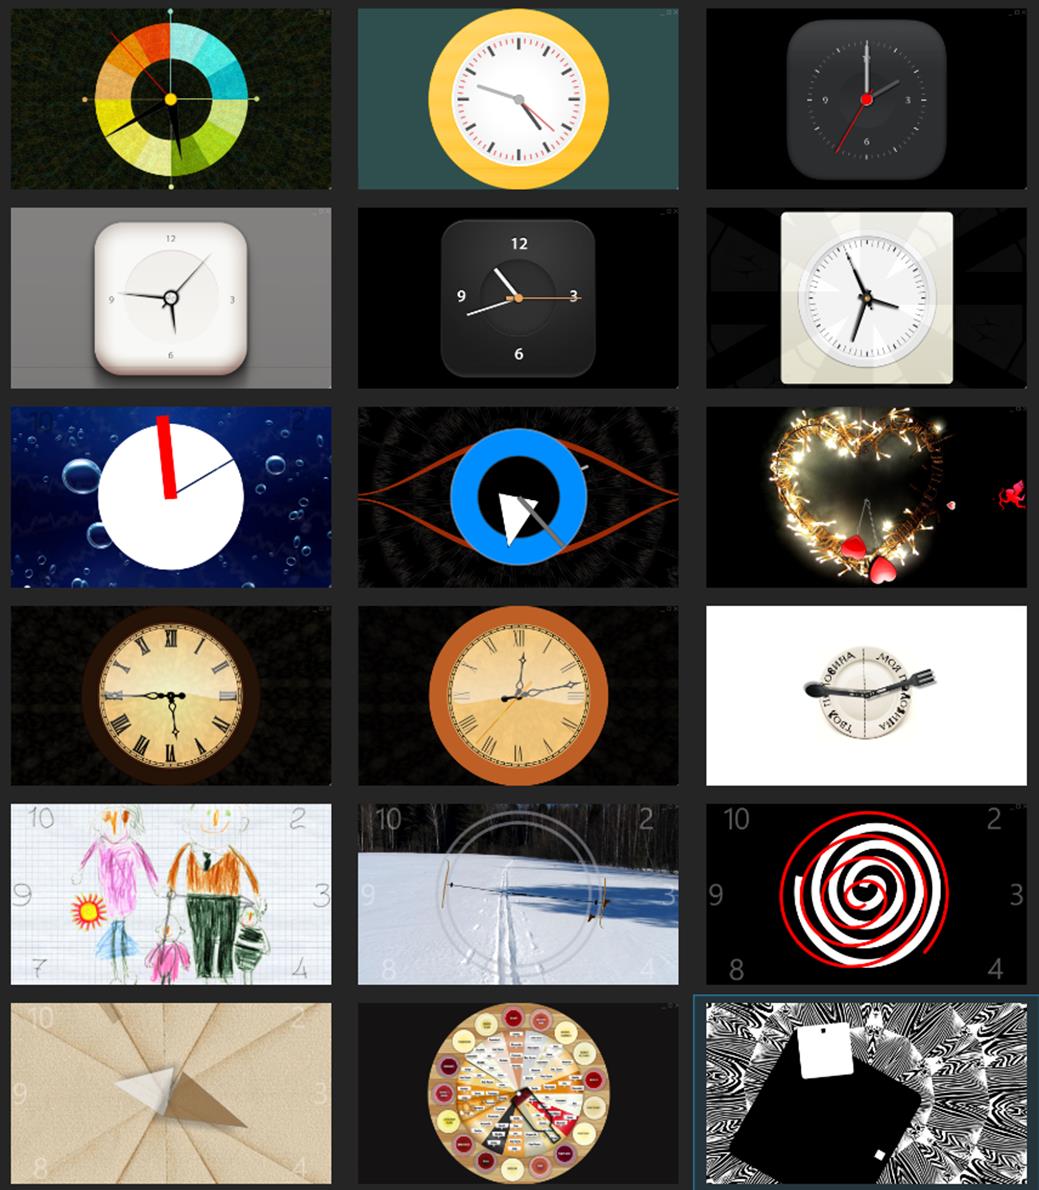
Double click opens the selected project. They are also available through the button ![]() in the folder "c:\Users\Public\Documents\ArtScope\" and their name starts with a Clock....
in the folder "c:\Users\Public\Documents\ArtScope\" and their name starts with a Clock....
Layer 5 - for fixed images, for example digits in clock animation project. On the other hand, it can be a static frame.
Run the program, when it opens, press Ctrl + N. Upload into the layer 2 icon -1 (10) .PNG from the folder c:\Users\Public\Documents\ArtScope\Tiles\. To do this, click ![]() and select file 1 (10) .PNG. Move the slider
and select file 1 (10) .PNG. Move the slider ![]() to change a pattern, you can get quite a beautiful one, such as:
to change a pattern, you can get quite a beautiful one, such as:
Double click on the slider to push it to the utter left position. To remove background transparency - click the button ![]() , a color selector form will appear.
, a color selector form will appear.
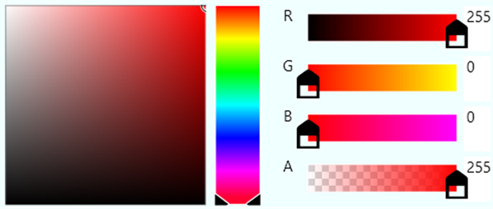
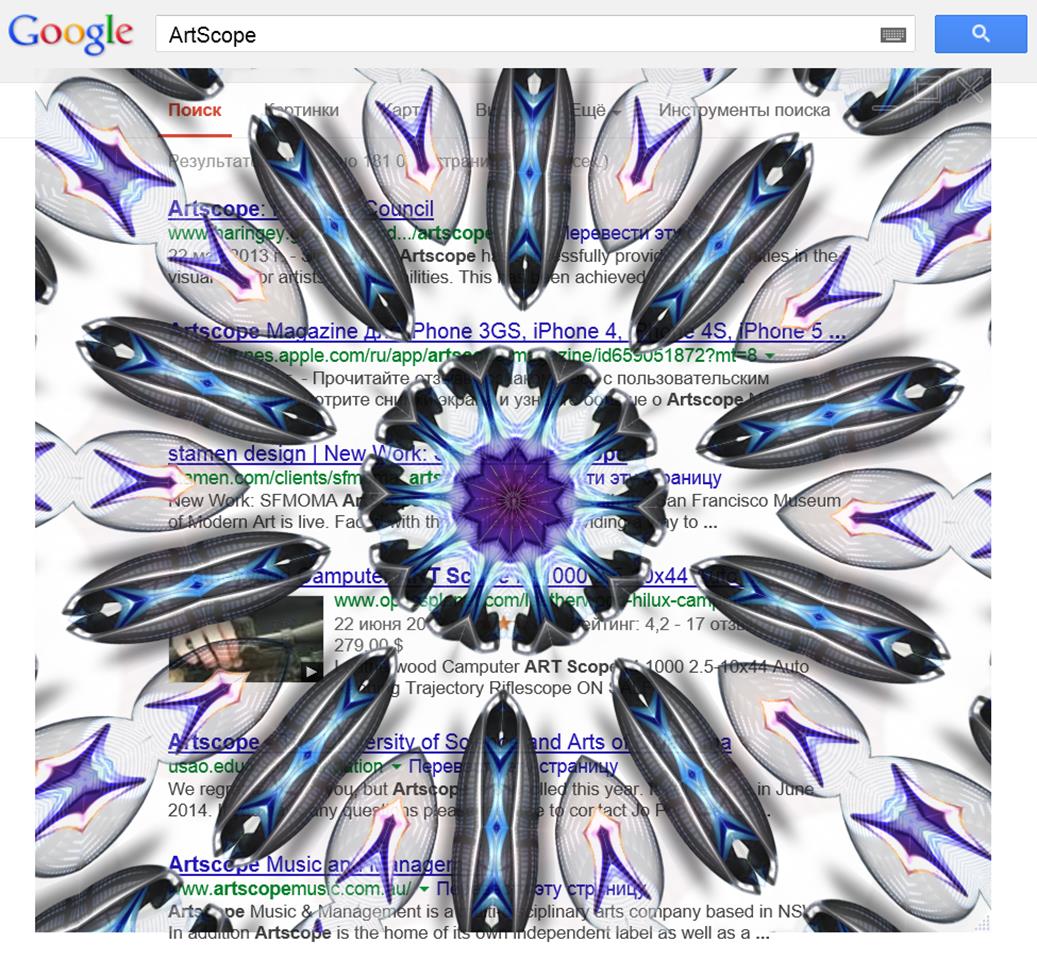
Move the slider A to the left (0 value) and press OK. As a result - the background behind the pattern disappears! Press Ctrl+P – to replicate the pattern and a new file will be created. Press F5 to start animation. Press Spacebar to make the control panel visible, move smoothly the layer’s 2 control sliders, during the animation. You can get a pattern like this - a snapshot of the animation on top of Google website.
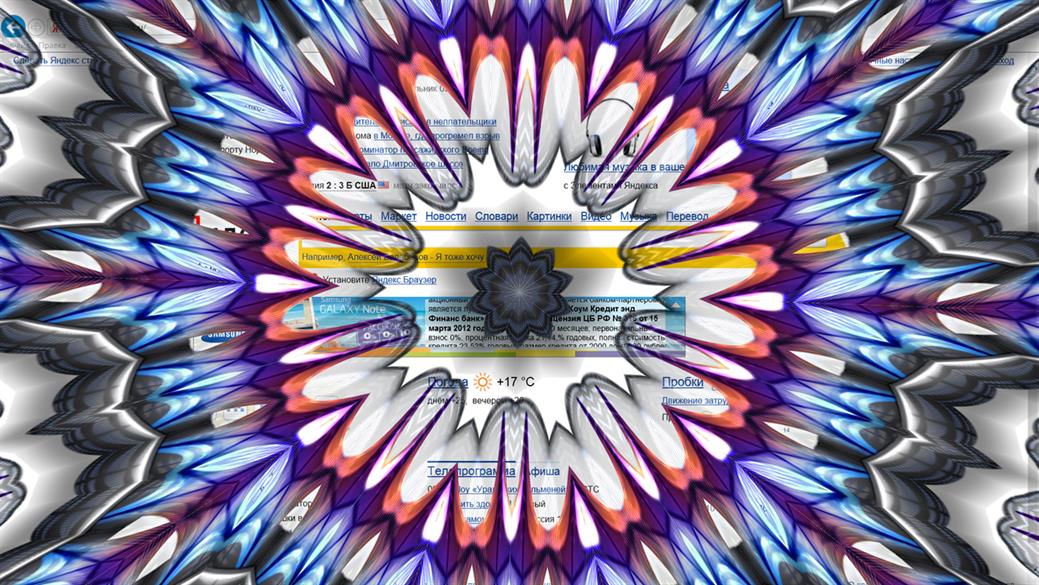
Or like this.
Press F6. To see all images breakdown by layers. This example - Sample3.scope.
Tip: To create your own patterns, use key combination - Ctrl + P.
Kaleidoscope download now... Download ArtScope – art game in the Kaleidoscope
Esc – minimize.
F1 - Help.
F2 – show application settings.
F3 – on/off top of all other Windows.
F5 – start/stop animation.
F6 – show layers’ lists of images, see List Of Images.
F7 – list of clock and clock hands to select, see List Of clocks.
F8, Spacebar - show/hide animation toolbar.
F11 – show window to enter paymentId (permanent license).
F12 or Ctrl+![]() – show Menu.
– show Menu.
Ctrl+double click on the program icon (or start the program by holding Ctrl) - restore files examples
Ctrl+O – open project (animation).
Ctrl+S - save project (animation).
Ctrl+Alt+S – save project (animation) as...
Ctrl+Shift+S – save the image as a PNG file with trimming edges (if the edges are transparent).
Shift+S – save the image as a PNG file.
Ctrl+N – new project.
Ctrl+Y - set window size = 1280x720.
Ctrl+Alt+Y - set window size = 1920x1080.
Ctrl+V to paste the image from clipboard in layer 2, if the opacity of the 2nd layer is greater than 0.
Ctrl+V to paste the image from the clipboard into the layer 3, if the opacity of the 2nd layer = 0.
Ctrl+Shift+V - paste image from Clipboard in layer 3.
Ctrl+![]() /
/![]() /
/![]() - open image of the corresponding layer in the default viewer.
- open image of the corresponding layer in the default viewer.
Ctrl+ ![]() , Ctrl+F5 – to create a series of images and video.
, Ctrl+F5 – to create a series of images and video.
1. Create animation. While creating a video, set slider value (time slider change image) greater or equal to 4 seconds.
2. Press F2 and adjust parametersю Add sound if necessary – see Application settings, save and close Application settings.
3. Ctrl+ ![]() , Ctrl+F5 – to create a series of images and video. When creating a video/series of image, the main window becomes static and not respond. Generated files in JPG or PNG format (selected in the parameter file Format images) are stored in the folder Video path\YouAnimationProjectName - YouTube. After creating a set of images ArtScope create a video file. The quality of the video defined:
, Ctrl+F5 – to create a series of images and video. When creating a video/series of image, the main window becomes static and not respond. Generated files in JPG or PNG format (selected in the parameter file Format images) are stored in the folder Video path\YouAnimationProjectName - YouTube. After creating a set of images ArtScope create a video file. The quality of the video defined:
The speed of the video stream ( see application settings).
The image quality JPG (see application settings).
Recommended bitrate for clips in SDR (standard dynamic range) format:
Broadcast type | Bitrate video, standard frame frequency | Bitrate video, high frame frequency (48, 50, 60) |
2160p (4К) | 35–45 Мбит/c | 53–68 Мбит/c |
1440p (2К) | 16 Мбит/c | 24 Мбит/c |
1080p | 8 Мбит/c | 12 Мбит/c |
720p | 5 Мбит/c | 7,5 Мбит/c |
480p | 2,5 Мбит/c | 4 Мбит/c |
360p | 1 Мбит/c | 1,5 Мбит/c |
Good results are obtained: number of frames/sec. = 25, the speed of the video stream 5000-18000, Quality JPG = 75-100 (when choosing a PNG quality is always higher).
Errors during start-video
In most cases this you do not have the appropriate codecs for your player. The easiest way to download MPC-HC player and set extensions .avi as default. Select video file, right click, properties, press Change, and select MPC-HC.
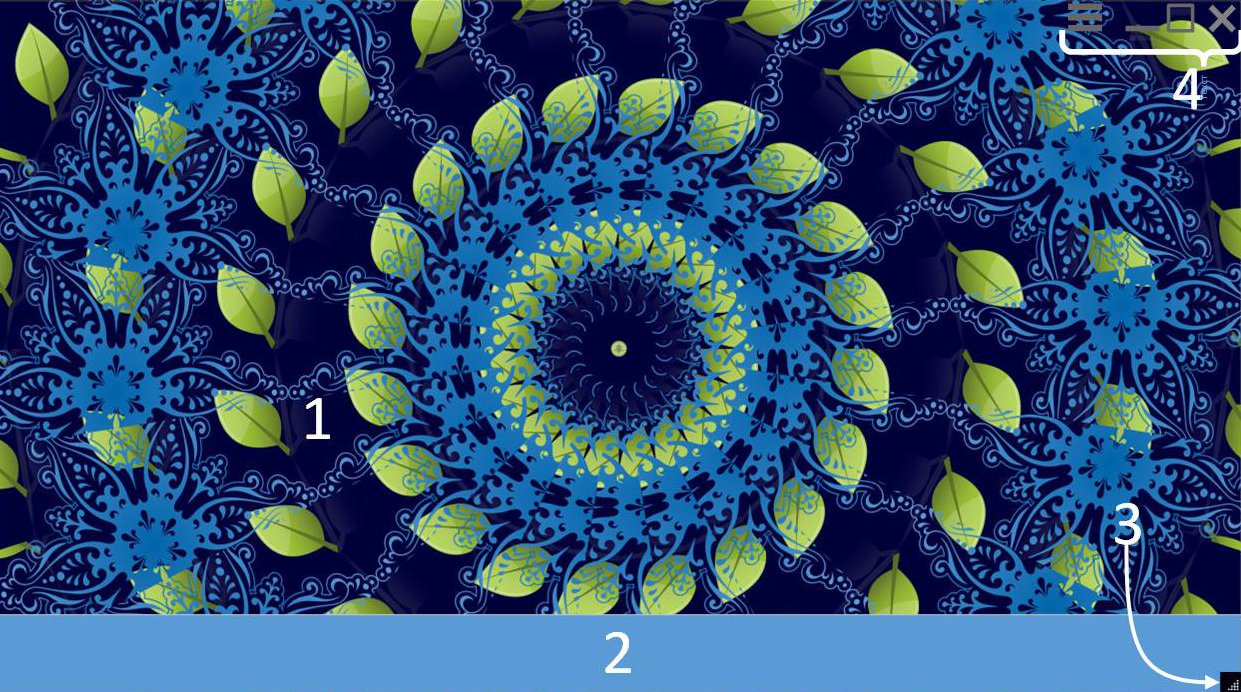
1. The left mouse button down (in this zone) and then you can move the window.
2. Space bar, F8, mouse down click here - to show/ hide toolbar panel
3. Resize window
4. The upper right corner contains buttons – menu, minimize, resize and close the window. Move the mouse cursor there to appear the buttons during the animation stop.
To change an image in the layer (if you have several images for one layer) place the mouse cursor over the layer’s zone (blue zones in the white frames below) and roll up or down scrolling wheel.

Project files (examples created during installation) are stored in the following directory - c:\Users\Public\Documents\ArtScope.


